gelish soft gel tips instructions
Gelish Soft Gel Tips are pre-shaped‚ flexible nail enhancements offering a natural look and durability․ They’re lightweight‚ easy to apply‚ and come in various styles for customizable beauty solutions․
What Are Gelish Soft Gel Tips?
Gelish Soft Gel Tips are pre-shaped‚ flexible‚ and lightweight nail enhancements designed for quick and durable applications․ They provide a natural look and smooth surface for gel polish․ These tips are part of a 3-part system‚ including Tip Primer and Adhesive‚ ensuring a secure and bubble-free application․ Available in various shapes and sizes‚ they cater to different nail styles and preferences․ Their flexibility prevents damage to natural nails‚ making them a popular choice for both professionals and DIY enthusiasts․ They offer up to 21 days of wear and are easy to customize for a professional finish․
Benefits of Using Gelish Soft Gel Tips
Gelish Soft Gel Tips offer numerous benefits‚ including a natural appearance‚ lightweight feel‚ and durability․ They provide a smooth surface for gel polish application and are pre-shaped for convenience․ These tips are easy to apply and require minimal filing‚ reducing preparation time․ Their flexibility prevents damage to natural nails‚ making them ideal for long-term wear․ With proper application‚ they can last up to 21 days without chipping or lifting․ The tips are customizable to suit various nail styles and are suitable for both professional use and DIY applications‚ offering a salon-quality finish at home․
Why Choose Gelish Soft Gel Tips for Nail Enhancements
Gelish Soft Gel Tips are an excellent choice for nail enhancements due to their durability‚ ease of application‚ and professional finish․ They are pre-shaped and full-coverage‚ making them ideal for quick transformations․ These tips are lightweight‚ flexible‚ and designed to last up to 21 days without lifting․ Their smooth surface ensures flawless gel polish adhesion‚ and minimal filing is required‚ preserving natural nail health․ Perfect for both professionals and DIY enthusiasts‚ Gelish Soft Gel Tips offer a customizable‚ long-lasting solution that enhances nail beauty while maintaining comfort and convenience․
Preparation for Applying Gelish Soft Gel Tips
Preparation involves sanitizing nails‚ pushing back cuticles‚ cleaning the nail plate‚ and shaping natural nails to ensure a smooth‚ secure fit for the Soft Gel Tips․
Sanitizing the Nails and Hands
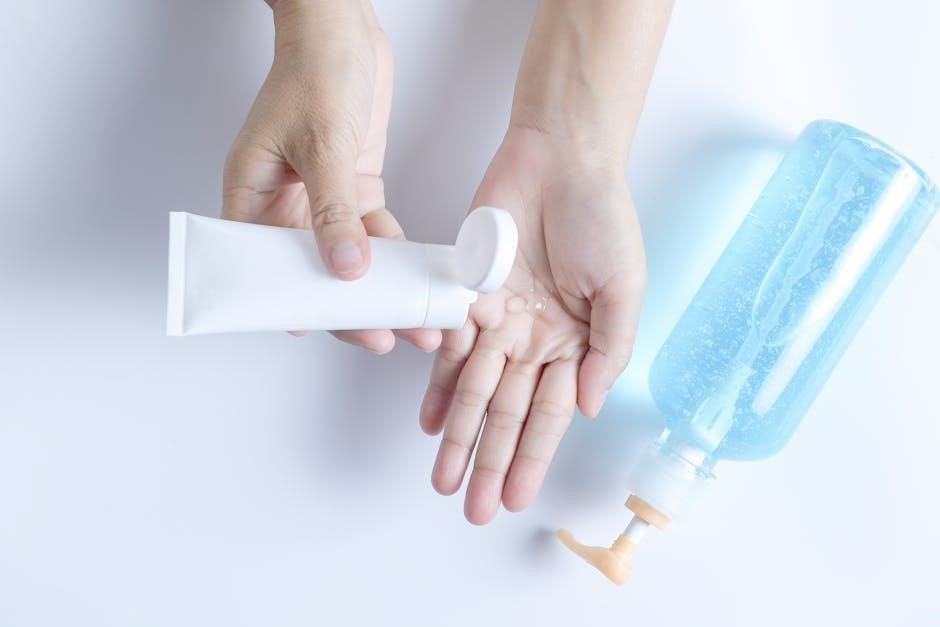
Sanitizing is essential to prevent infections and ensure proper adhesion of Gelish Soft Gel Tips․ Wash hands thoroughly with soap and water․ Cleanse nails using a lint-free wipe soaked in nail sanitizer or alcohol‚ removing oils and residue․ Dry nails completely before proceeding․ This step ensures a clean‚ bacteria-free surface for tip application‚ promoting long-lasting results and preventing lifting or contamination․ Proper sanitization is crucial for a successful and durable application of Gelish Soft Gel Tips․
Pushing Back the Cuticles
Pushing back the cuticles is a crucial step in preparing for Gelish Soft Gel Tips․ Use a cuticle pusher to gently move the cuticles away from the nail plate‚ taking care not to cause irritation or bleeding․ This ensures a smooth surface for tip application and prevents uneven adhesion․ After pushing‚ wipe the area with a lint-free wipe to remove any residue․ Proper cuticle care enhances the natural appearance of the tips and promotes a secure‚ long-lasting bond between the nail and the Gelish Soft Gel Tip․ This step is essential for achieving a professional finish․
Cleaning the Nail Plate
Cleaning the nail plate is essential for proper adhesion of Gelish Soft Gel Tips․ Use lint-free wipes moistened with Nail Surface Cleanse to gently remove oils‚ residue‚ and contaminants from the natural nail․ This step ensures a clean‚ dry surface for tip application‚ promoting a strong bond and preventing lifting․ Avoid using harsh chemicals or oils‚ as they can interfere with the adhesive properties of the Gelish Soft Gel Tips․ Proper cleansing guarantees a secure and durable application‚ enhancing the overall longevity of the nail enhancements․
Shaping and Buffing the Natural Nails
Shaping and buffing the natural nails ensures a smooth surface for Gelish Soft Gel Tips․ Use a nail file to gently shape the nails to your desired shape‚ avoiding excessive filing that could weaken the nail․ Next‚ buff the surface with a 100/180 buffer to create a slight texture‚ enhancing adhesion․ Remove any dust with a lint-free wipe and Nail Surface Cleanse․ This step is crucial for a seamless application‚ ensuring the tips adhere properly and last up to 21 days without lifting or separation․
Application Process of Gelish Soft Gel Tips
Shaping and buffing the natural nails ensures a smooth surface for Gelish Soft Gel Tips․ Use a nail file to gently shape the nails to your desired shape‚ avoiding excessive filing that could weaken the nail․ Next‚ buff the surface with a 100/180 buffer to create a slight texture‚ enhancing adhesion․ Remove any dust with a lint-free wipe and Nail Surface Cleanse․ This step is crucial for a seamless application‚ ensuring the tips adhere properly and last up to 21 days without lifting or separation․
Choosing the Right Size and Shape of the Tips
Choosing the right size and shape of Gelish Soft Gel Tips ensures a natural appearance and durability․ Compare tip sizes to your natural nail bed to achieve a seamless fit․ Select shapes that complement your nail bed or personal style‚ such as stiletto‚ almond‚ or square․ Gently file the underside of the tip if needed for a perfect fit․ Proper sizing prevents lifting and ensures long-lasting wear․ Use the sizing chart provided or measure against your natural nail for accuracy․ This step is crucial for a professional‚ polished finish and optimal comfort․
Applying Gelish Tip Primer
Apply Gelish Tip Primer to both the natural nail and the Soft Gel Tip to ensure a strong bond․ Use a thin layer‚ avoiding the cuticles and skin․ Allow it to dry completely before attaching the tip․ This step enhances adhesion and prevents lifting‚ ensuring a durable and long-lasting finish․ Proper preparation is key for a professional result․ Always follow the product instructions for optimal performance․ This ensures the tips stay securely in place for up to 21 days of wear․ A well-prepared surface is essential for a flawless application․
Attaching the Soft Gel Tips
Align the Soft Gel Tip with the natural nail‚ starting at the cuticle․ Gently press and roll the tip from the cuticle to the free edge using constant pressure․ This rolling motion prevents air bubbles and ensures a snug fit․ Secure the tip firmly‚ making sure it aligns with the nail grooves․ Proper placement is crucial for a natural look and durability․ Once attached‚ the tip should feel seamless with the natural nail‚ ready for the next steps in the application process․ Ensure a close fit for optimal results and long-lasting wear․ This step requires precision and care for the best outcome․

Sealing the Tips with Gelish Adhesive
Apply a thin‚ even layer of Gelish Adhesive to the back of the Soft Gel Tip and the prepared natural nail․ Ensure proper coverage without over-application‚ as excess adhesive can pool around the cuticles․ Cure the adhesive under an LED light for 30 seconds or a UV light for 2 minutes․ This step bonds the tip securely to the nail‚ ensuring a durable and long-lasting hold․ Proper sealing is crucial for preventing lift-off and ensuring the tips stay intact for up to 21 days․ Follow the curing times precisely for optimal adhesion and a professional finish․
Curing the Adhesive Under LED or UV Light
Place the hand under the LED light for 30 seconds or a 36W UV light for 2 minutes to cure the Gelish Adhesive․ Ensure the light evenly covers all tips for proper hardening․ The curing process bonds the tip to the nail‚ creating a strong‚ durable hold․ Avoid moving the hand during curing to prevent any movement․ Once cured‚ the tips are securely attached‚ ready for further finishing․ Proper curing ensures long-lasting wear and prevents lift-off‚ providing a professional finish․ Follow the manufacturer’s guidelines for exact curing times to achieve optimal results․
Finishing Touches After Tip Application
Refine edges‚ buff surfaces for smoothness‚ and remove excess gel or adhesive for a polished look‚ ensuring tips blend seamlessly with natural nails for a professional finish․
Refining the Edges of the Tips
Refining the edges ensures a seamless blend with natural nails․ Use nail files and buffers to shape and smooth the tips‚ achieving desired length and style․
Buffing the Tips for a Smooth Surface
Buffing the tips creates a smooth surface for polishing․ Use a buffer block to gently remove ridges and imperfections‚ ensuring an even finish․ This step enhances durability and appearance․
Removing Excess Gel or Adhesive
After curing the adhesive‚ carefully inspect the tips for excess gel or adhesive around the cuticles or nail edges․ Use a lint-free wipe or cotton swab dipped in nail cleanser to gently remove any overflow․ Be cautious not to press too hard‚ as this could lift the tip from the nail․ This step ensures a clean finish and prevents uneven polish application․ Removing excess material is crucial for maintaining the longevity and professional appearance of your Gelish Soft Gel Tips․ Patience and attention to detail here will result in a flawless‚ salon-quality manicure․
Applying Gel Polish Over Gelish Soft Gel Tips
Apply a thin base coat‚ followed by gel polish in thin layers‚ curing under LED or UV light․ Finish with a top coat for a professional finish․
Prepping the Tips for Gel Polish
After attaching the Gelish Soft Gel Tips‚ ensure the surface is ready for gel polish․ Lightly buff the tips to create a smooth‚ even surface․ Use lint-free wipes to remove any dust or residue․ Shape the tips to your desired style‚ ensuring edges are refined․ Gently clean the tips with a nail cleanser to remove oils or impurities‚ promoting better adhesion․ Allow the surface to dry completely before applying base coat․ Proper preparation ensures a long-lasting‚ professional finish when applying gel polish over the tips․
Applying Base Coat
Applying a thin layer of base coat is essential for a polished finish․ Using a Gelish base coat‚ paint a thin‚ even layer from the cuticle to the tip․ Ensure complete coverage without pooling at the cuticles․ Avoid getting base coat on the skin or cuticles‚ as this can cause lifting․ Cure under the LED light for 30 seconds or UV light for 2 minutes․ This step creates a smooth surface for the gel polish and protects the nail‚ ensuring long-lasting wear and a professional finish․ Proper application is key for optimal results․
Applying Gel Polish in Thin Layers
Apply Gelish gel polish in thin‚ even layers to avoid pooling․ Start at the center‚ stroke towards the tip‚ and finish with a clean edge․ Cure each layer under LED or UV light for the recommended time․ Multiple thin coats ensure a smooth‚ bubble-free finish and prevent peeling․ Avoid overloading the brush‚ as this can lead to uneven coverage․ Use light‚ steady strokes to maintain control and achieve a professional look․ Proper layering enhances durability and color vibrancy‚ making your gel tips look salon-fresh for up to 21 days․
Sealing with Top Coat
Finish by applying a thin layer of Gelish Top It Off Gel from cuticle to free edge‚ sealing the tips to prevent chipping․ Cure under LED for 30 seconds or UV for 2 minutes․ This step ensures a glossy‚ protective barrier and extends wear․ Use a lint-free wipe to gently remove excess gel from around the cuticles and nail bed․ Proper sealing is crucial for a professional finish and long-lasting results․ Avoid touching the nails until fully cured to maintain the smooth‚ high-shine surface․ This final step completes your Gelish Soft Gel Tips application‚ leaving your nails looking polished and pristine․
Curing the Gel Polish
After applying the top coat‚ cure the gel polish under the LED light for 30 seconds or a 36W UV light for 2 minutes․ Ensure the entire nail surface is exposed to the light for even curing․ Proper curing ensures durability and prevents chipping․ Avoid moving the hand during curing to maintain a smooth finish․ Once cured‚ wipe off the tacky residue with a lint-free wipe soaked in nail cleanser․ This step finalizes the gel polish application‚ leaving a long-lasting‚ high-gloss finish․ Always follow the recommended curing times for optimal results with Gelish Soft Gel Tips․
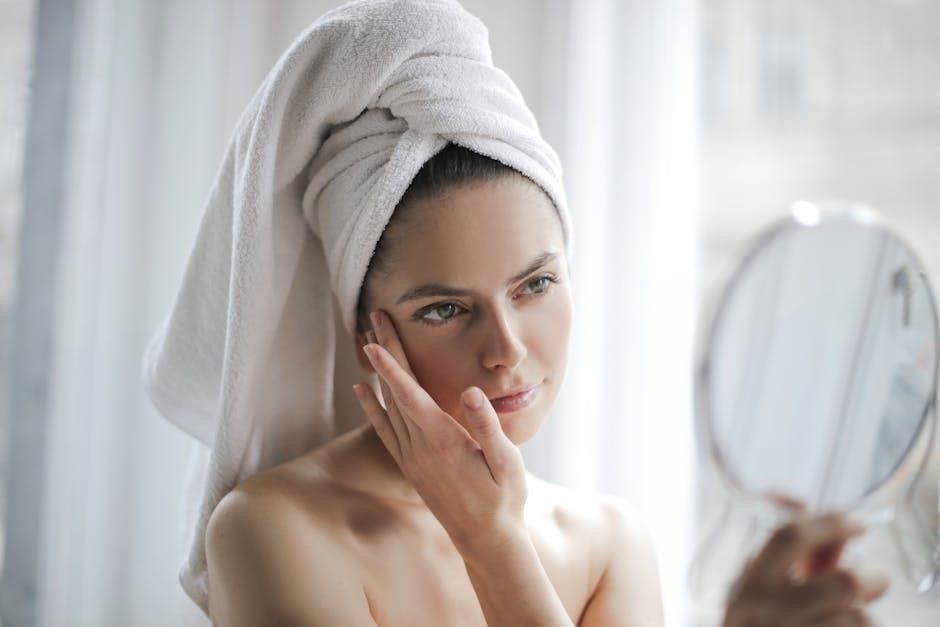
Aftercare and Maintenance
Avoid harsh chemicals and gently handle nails to prevent damage․ Maintain nail hygiene by cleaning around the tips and keeping hands moisturized for long-lasting‚ healthy-looking results․
Handling the Nails After Application
After applying Gelish Soft Gel Tips‚ handle the nails with care to ensure longevity․ Avoid using nails as tools for opening packages or picking items‚ as this can cause damage or lifting․ Keep the nail area clean and dry to prevent bacteria buildup․ Refrain from submerging hands in water for extended periods‚ especially during the first 24 hours․ Gently wash hands with mild soap and avoid exposure to harsh chemicals․ Moisturize the cuticles and surrounding skin to maintain hydration and prevent dryness․ By following these steps‚ you can enjoy durable and beautiful nail enhancements for up to 21 days․
Avoiding Harsh Chemicals
To maintain the integrity of Gelish Soft Gel Tips‚ avoid exposure to harsh chemicals‚ such as detergents‚ cleaning agents‚ or nail polish removers․ These can weaken the adhesive and cause the tips to lift prematurely․ When engaging in activities involving chemicals‚ wear protective gloves to shield your nails․ Use mild soap for handwashing and avoid submerging your hands in water for extended periods․ Additionally‚ refrain from using acetone or other solvents near the nail area‚ as they can damage the gel surface․ Protecting your nails from chemicals ensures a longer-lasting‚ professional finish․
Maintaining Nail Hygiene
Maintaining nail hygiene is crucial for the longevity of Gelish Soft Gel Tips․ Regularly sanitize your hands and nails using an antibacterial soap and avoid touching the tips excessively․ Moisturize your cuticles and hands to prevent dryness‚ which can lead to lifting․ Avoid using harsh products near the nails and keep the area around the tips clean․ Proper hygiene practices help prevent infections and ensure the tips adhere properly‚ maintaining a professional and healthy appearance․ Consistent care enhances both the durability and the visual appeal of your Gelish Soft Gel Tips․
Removal of Gelish Soft Gel Tips
Gently pry off the tips using a nail tool after soaking in acetone․ Clean the area thoroughly to remove any residual adhesive‚ ensuring a safe and damage-free process․
Preparing for Removal
Before removing Gelish Soft Gel Tips‚ prep your nails by gently buffing the surface to break the seal․ Soak a cotton pad with acetone and place it on each nail‚ securing with foil to loosen the adhesive․ This step ensures a safe and effective removal process without damaging your natural nails․ Proper preparation helps prevent lifting and promotes a smooth removal experience․
Using Acetone for Safe Removal
Acetone is essential for safely removing Gelish Soft Gel Tips․ Saturate a cotton pad with acetone and place it on each nail‚ wrapping with foil to hold in place․ Let it sit for 10–15 minutes to soften the adhesive․ Gently pry the tip off starting from one edge․ Avoid force to prevent nail damage․ After removal‚ clean and moisturize the nails to restore health and hydration․
Gently Prying Off the Tips
After soaking‚ use a cuticle pusher or orange stick to gently pry the Gelish Soft Gel Tips from the natural nail․ Start at one edge and carefully work around the tip․ Avoid applying too much force‚ as this can damage the nail․ If resistance is met‚ stop and reapply acetone before continuing․ Once removed‚ clean any remaining adhesive and buff the nail surface for a smooth finish․ This method ensures safe and effective removal without causing harm to the natural nail․
Cleaning Up After Removal
After removing the Gelish Soft Gel Tips‚ thoroughly clean the nail surface using lint-free wipes soaked in acetone․ Gently wipe away any remaining adhesive or residue․ Wash your hands to remove any acetone or leftover product․ Moisturize your cuticles and nails with a hydrating cuticle oil or cream to restore hydration․ Finally‚ buff the natural nails to smooth out any ridges and restore their natural shine․ Proper cleanup ensures healthy nails and prepares them for future applications or natural wear․
Tips and Tricks for a Professional Finish
Use a lint-free wipe to remove excess gel‚ ensuring a clean finish․ Align tips precisely for a seamless look and cure under the correct light for durability․
Ensuring Bubble-Free Application
To achieve a bubble-free application‚ start by ensuring the nail and tip are properly aligned․ Use a rolling motion when placing the tip‚ applying constant pressure from the cuticle to the free edge․ This helps eliminate air pockets․ Gently press the tip to secure it‚ ensuring a snug fit․ Use a lint-free wipe to remove any excess adhesive․ If bubbles appear‚ lightly press them with an orange stick or a clean tool․ Proper preparation‚ such as cleaning the nail surface and using the correct primer‚ also minimizes bubbles‚ ensuring a smooth‚ professional finish․
Using the Right Tools for Application
Using the right tools is crucial for a successful application of Gelish Soft Gel Tips․ Essential tools include a cuticle pusher‚ orange stick‚ lint-free wipes‚ nail buffer‚ and a LED/UV lamp․ The cuticle pusher helps prepare the nail surface‚ while the orange stick ensures proper tip placement and bubble removal․ Lint-free wipes clean the nail plate‚ preventing residue․ A nail buffer shapes and smooths the natural nail․ The LED/UV lamp cures the adhesive and gel polish‚ securing the tips in place․ Additionally‚ a gel brush is useful for applying primer and adhesive precisely․ These tools ensure a professional‚ long-lasting finish․
Maintaining Proper Curing Times
Maintaining proper curing times is essential for a durable and professional finish when using Gelish Soft Gel Tips․ Cure the adhesive under an LED light for 30 seconds or a UV light for 2 minutes․ For gel polish‚ use 30 seconds under LED or 2 minutes under UV․ Always follow the manufacturer’s guidelines to ensure the product sets correctly․ Proper curing ensures long-lasting wear and prevents lifting․ Flash curing for 5 seconds can help set the base coat before applying polish․ Consistent curing times are key to achieving a salon-quality finish at home․
Troubleshooting Common Issues
Common issues with Gelish Soft Gel Tips include air bubbles‚ uneven application‚ and lifting․ Proper preparation‚ curing times‚ and technique are key to avoiding these problems․
Dealing with Air Bubbles
Air bubbles can form during the application of Gelish Soft Gel Tips‚ often due to improper technique or uneven pressure․ To prevent bubbles‚ use a rolling motion when attaching the tips‚ starting firmly at the cuticle area and applying constant pressure to the free edge․ If bubbles appear‚ gently prick them with a needle and smooth out the area with a brush․ Ensure the tip is properly aligned with the natural nail grooves to avoid trapped air․ Proper curing under LED or UV light helps secure the tip and reduce bubble formation; Regular practice improves application accuracy and minimizes air bubble issues․
Fixing Uneven Tips
If Gelish Soft Gel Tips appear uneven‚ gently refine the edges using a nail file to shape them symmetrically․ Buff the surface for a smooth finish‚ ensuring alignment with the natural nail․ Use a lint-free wipe to remove dust after filing․ For minor unevenness‚ apply a thin layer of gel polish to blend the edges․ Proper curing under LED or UV light ensures the tips adhere evenly․ To prevent unevenness‚ align the tip with the natural nail groove during application․ Regular practice and attention to detail will help achieve a professional‚ balanced look with Gelish Soft Gel Tips․
Preventing Lift-Off of the Tips
To prevent lift-off‚ ensure proper tip sizing and alignment with the natural nail groove․ Apply Gelish Tip Primer to both the nail and tip for a strong bond․ Secure the tip firmly from the cuticle to the free edge with constant pressure․ Cure under LED or UV light as instructed to fully adhere․ Avoid using harsh chemicals or excessive water‚ which can weaken the bond․ Regular maintenance and proper aftercare‚ such as avoiding extreme temperatures‚ will also help prevent lift-off․ This ensures long-lasting‚ durable nail enhancements with a professional finish․
Gelish Soft Gel Tips offer a durable‚ professional finish with minimal effort․ Their ease of use and long-lasting results make them ideal for achieving salon-quality nails at home․
Final Thoughts on Gelish Soft Gel Tips
Gelish Soft Gel Tips have revolutionized at-home nail enhancements with their ease of use and professional results․ Their durability and lightweight design make them ideal for long-lasting wear․ The tips are pre-shaped and customizable‚ offering a natural look that suits various nail styles․ With a quick 20-minute application process‚ they provide up to 21 days of wear‚ making them a convenient choice for nail enthusiasts․ Their smooth surface ensures effortless gel polish application‚ and the bubble-free attachment method enhances the overall finish․ Whether you’re a beginner or a seasoned pro‚ Gelish Soft Gel Tips deliver salon-quality results in the comfort of your home‚ making them a must-try for anyone seeking flawless nails․
Encouragement for Trying the Product
If you’re looking for a quick‚ easy‚ and professional way to enhance your nails‚ Gelish Soft Gel Tips are the perfect solution․ Their pre-shaped design and lightweight feel make them ideal for both beginners and experienced users․ With a fast 20-minute application process and up to 21 days of wear‚ they offer long-lasting results without the hassle․ Whether you’re aiming for a natural look or a bold statement‚ these tips provide a smooth canvas for gel polish․ Say goodbye to salon appointments and hello to stunning‚ professional-quality nails from the comfort of your home—why not give them a try and experience the difference for yourself?